
Getting Started: Your First Steps as a Host Family
You've created your family account — now what? This guide walks you through the five things to set up before your au pair arrives (or on day one): adding your children with their key information, setting up school schedules and weekly activities, and inviting your au pair to join.
By the end, your dashboard will be a live overview of your family's week — and your au pair will have everything they need at their fingertips.
What You'll Set Up
- Your first child profile with photo and birthdate
- Medical information, allergies, and emergency contacts
- School or Kita details with daily schedule
- Recurring weekly activities (sports, music, etc.)
- Daily routines (wake up, meals, bedtime)
- Your au pair's invitation to join the family
Your Starting Point: The Dashboard
When you first open AuPairSync after creating your family, you'll see a clean dashboard prompting you to get started. Two things stand out immediately:
- "Add Your First Child" — the big blue button in the Children section
- "Invite Your Au Pair" — a card below, ready for when your au pair needs access
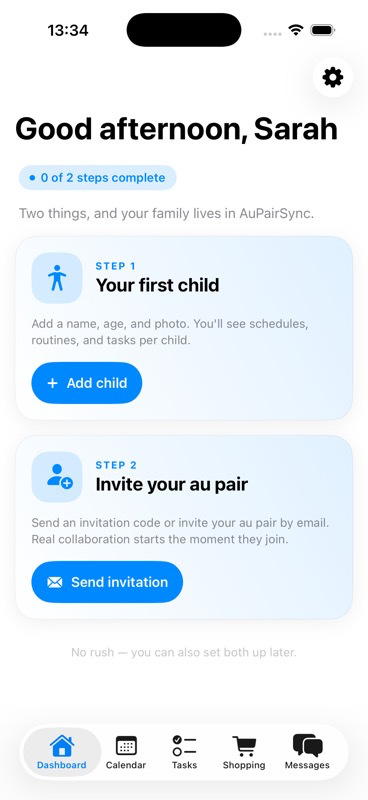
Let's start with the child profile — it's the foundation everything else builds on.
Step 1: Add Your First Child
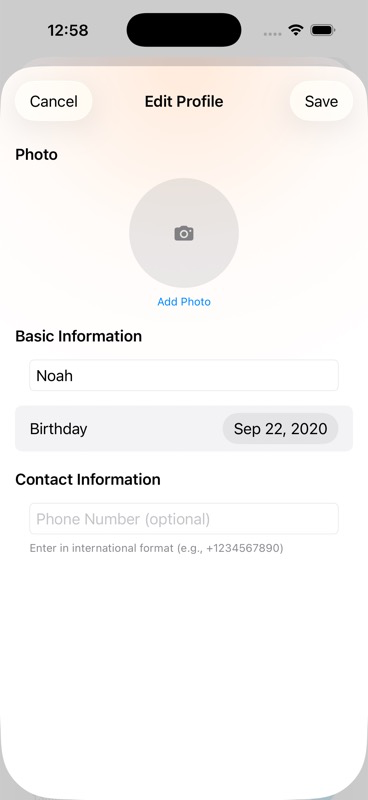
Tap Add Your First Child (or the + icon next to the Children header). The creation form asks for just the basics to get you started:
- Photo — tap the camera circle to add a profile photo (optional but helpful for your au pair)
- Name — your child's first name
- Birthdate — select from the calendar picker
That's it for the first step. Tap Save Child to create the profile.
Don't worry about getting everything perfect now. You can always add more details later. The goal is to get the profile created so you can start building the schedule.
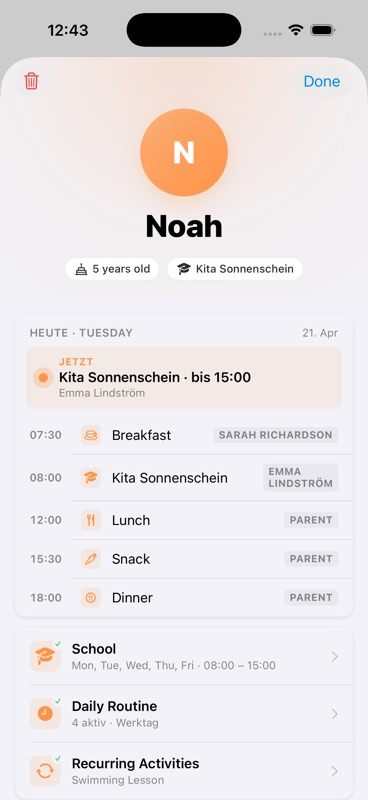
After saving, you land on the child's full profile page. This is where the real setup happens.
Step 2: Fill In Medical & Emergency Information
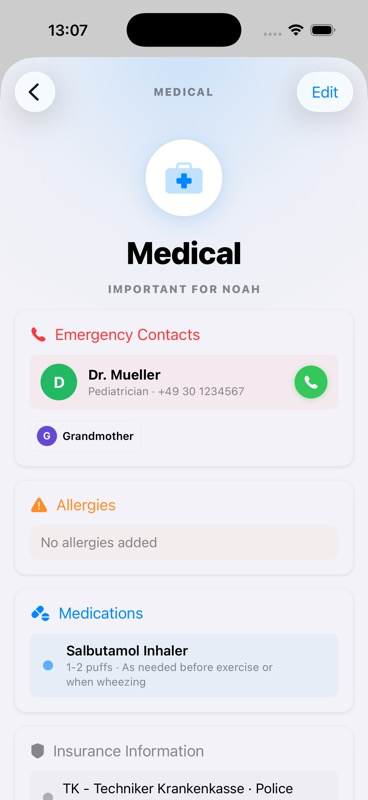
Scroll down to the Medical & Emergency section and expand it. This is the most important section for your au pair's safety — fill it out before they start.
What to add:
- Emergency Contacts — Your phone numbers, the pediatrician, nearby grandparents or neighbors who can help in a pinch. Include at least two contacts beyond yourself.
- Allergies — List every allergy, even mild ones. "Peanuts" is critical; "cats — mild sneezing" is still worth noting.
- Medications — Name, dosage, and frequency. "Aspirin, 1 tablet, daily" gives your au pair confidence to handle it correctly.
- Insurance Information — Insurance card details so your au pair can handle a doctor visit if needed.
Why this matters: Your au pair may be the one calling the pediatrician or taking your child to the ER. Having this information in the app — not on a piece of paper in a kitchen drawer — means they can access it instantly, even under stress.
Step 3: Add Preferences
Below Medical & Emergency, you'll find the Preferences section. This helps your au pair understand your child as a person, not just a schedule:
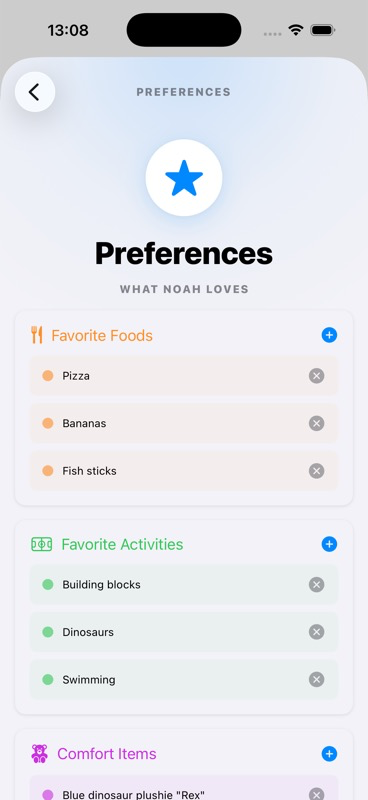
- Favorite Foods — What they love, what they'll always eat (helpful for meal planning)
- Favorite Activities — What keeps them happy and engaged
- Comfort Items — The stuffed animal they can't sleep without, the blanket for car rides
- Friends & Playdates — Add friends with parent contact details for easy playdate coordination
Step 4: Set Up School or Kita
Back on the child profile overview, you'll see the Kindergarten/School section. Tap Add School to set up daily school schedules.
The school setup form lets you configure:
- School name — e.g., "Philadelphia Secondary School"
- Address — the full street address (your au pair may need to navigate there)
- Per-day schedule — enable each day individually with specific start and end times
- Who brings / who picks up — assign a parent, au pair, or "Kid Goes Alone" for each day
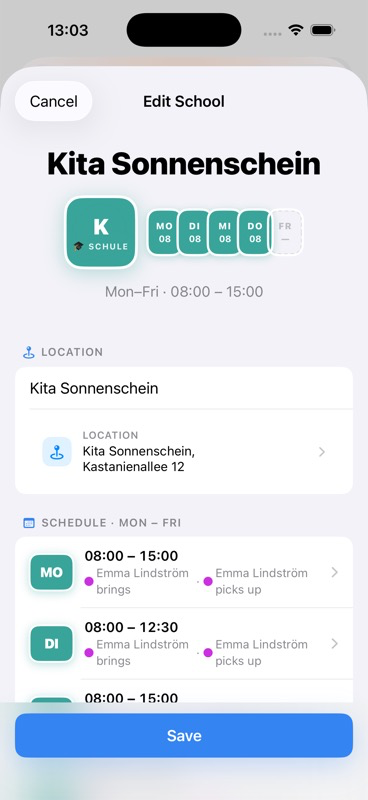
This is powerful because each day can be different — maybe your child goes to school Monday through Friday, but Wednesday is a half day ending at 13:00. Maybe the au pair brings them every morning but you pick up on Tuesdays. Set it all up once, and the calendar handles the rest automatically.
The "Kid Goes Alone" option is for older children who walk or bike to school independently. It keeps the calendar accurate without assigning someone unnecessarily.
Step 5: Add Recurring Activities
Tap the + button next to Recurring Activities on the child's profile. This is where you add weekly activities like sports, music lessons, or language courses.
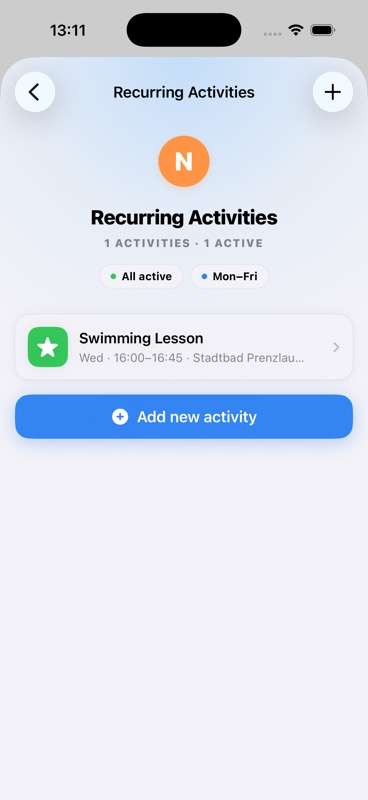
For each activity, you set:
- Activity name — "Soccer Practice", "Piano Lesson", "Swimming"
- Location — where it takes place
- Per-day schedule — enable specific days with their own times (soccer might be Tuesday and Thursday at different times)
- Who brings / who picks up — per day, just like school
Once saved, these activities automatically appear on the shared calendar every week. No need to create individual events — they're generated for you.
Step 6: Set Up Daily Routines
The Daily Routines section lets you define the daily rhythm — wake-up time, meals, bath time, bedtime. Tap into it and configure each routine step:
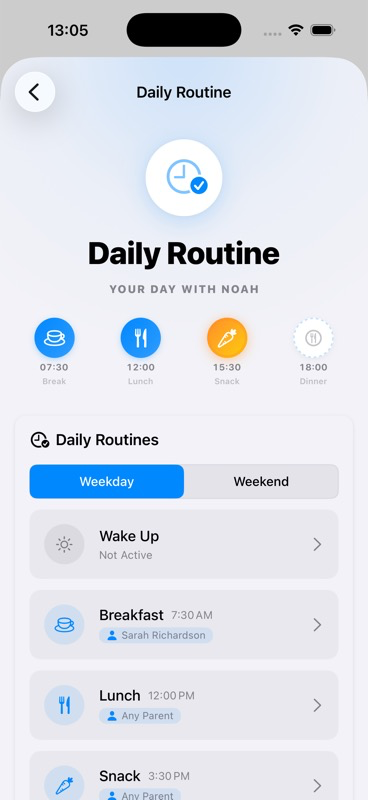
Each routine has:
- Time — when it should happen
- Assign to — who's responsible (parent or au pair)
- Notes — any special instructions ("breakfast must include fruit", "no screens before school")
This gives your au pair a clear picture of the daily flow without needing a verbal walkthrough every morning.
Step 7: Invite Your Au Pair
Once your children's profiles are set up, it's time to bring your au pair on board. From the dashboard, tap the Invite Your Au Pair card (or go to Settings → Family Management and tap Invite Another Au Pair).
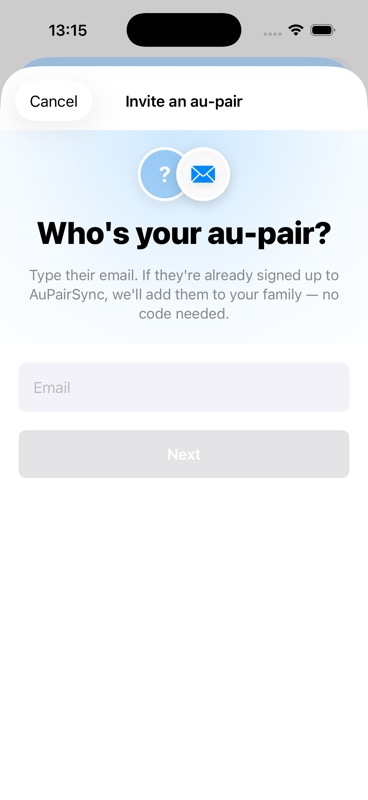
You'll see two ways to share the invitation:
- QR Code — your au pair scans it directly with their phone camera
- 6-Character Code — a short alphanumeric code they can type in manually (useful if you're not in the same room)
The code is valid until used — no expiry pressure. Tap the blue Share Invitation button to send it via WhatsApp, email, or any messaging app.
Your au pair downloads AuPairSync, chooses "Join as Au Pair" on the registration screen, and enters the code. They'll instantly see everything you've set up — children's profiles, schedules, activities, and medical information.
Your Dashboard Comes to Life
After completing these steps, your dashboard transforms from empty to a live command center:
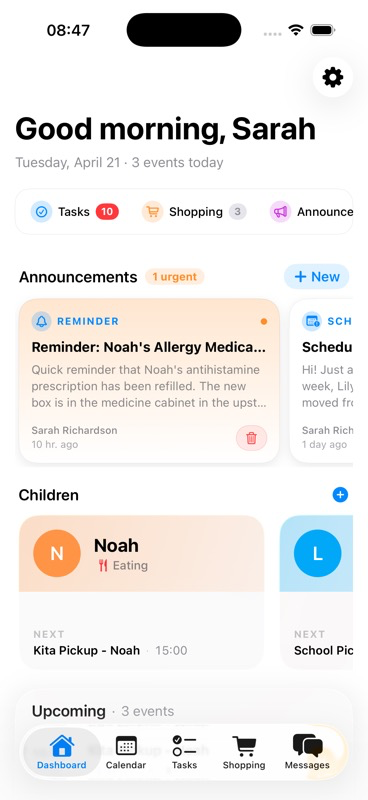
You'll see:
- Announcements — important updates with read confirmation
- Children cards — each child with their current status ("At School") and next upcoming activities
- Babysitting Requests — if you use the babysitting feature
- For You — helpful articles and tips based on your family's stage
What to Explore Next
With the foundation in place, here are the features to set up when you're ready:
- Create your first announcement — Welcome your au pair with an official announcement
- Set up tasks — Assign daily and recurring household tasks
- Explore the shared calendar — See how school and activities appear on the calendar
- Create a shopping list — Share grocery lists with real-time check-off
- Use the message hub — Chat within tasks and shopping lists for context-rich communication
Tips for a Smooth Start
- Do the child profile setup before your au pair arrives — Having medical info, school schedules, and routines ready means day one is about meeting the family, not administrative setup.
- Start with one child — Get comfortable with the profile, then add siblings. The process gets faster each time.
- Don't skip the medical section — This is the information your au pair needs most urgently and is least likely to ask about proactively.
- Review together on day one — Sit down with your au pair, open the app, and walk through the children's profiles together. Five minutes of shared context prevents weeks of confusion.
Ready to set up your family? Download AuPairSync and have your household organized before your au pair's first day.
Questions? Contact us at support@aupairsync.com
Ready to simplify your au pair life?
Tasks, calendar, messaging and more — all in one app.

Related Articles

Managing Tasks with Photos and Context
Learn how to create clear, visual task assignments using photos and detailed context. Make task completion easier for your au pair with step-by-step visual guides.
7 min read

Coordinating Schedules with the Shared Calendar
Master family schedule coordination using AuPairSync's shared calendar. Learn best practices for managing events, avoiding conflicts, and keeping everyone in sync.
6 min read

Shopping Lists: The Complete Guide to Shared Grocery Shopping
Learn how to create, share, and manage shopping lists in AuPairSync. Step-by-step guide covering list creation, smart suggestions, real-time check-off, expense claims, and more.
8 min read